

|
Tutorial 3: Preparing Genome Information and Visualization (cont.) |
|
In order to take the full advantage of CisGenome’s power, you will need to have genome information stored in your local computer. This information can be obtained by downloading various genome databases from our download page. For example, if you are studying mouse, you can download our mouse genome database (e.g., mm8). This pre-compiled database contains all the necessary information required to support genome operation functions of CisGenome, e.g., visualizing gene structures, retrieving DNA sequences, and motif mapping, etc.
To download a genome database, simply click the one you want to use, and save it to whatever folder you choose. The database usually have a “.gz”, “.zip” or “.exe” suffix. In the first two cases, after downloading you need to unzip the database using software such as gzip, unzip, WinZip, WinRAR etc. In the “.exe” case, the file is self-extractable, just double click it after downloading to install the database. The downloading procedure will take some time. While you are waiting, let’s continue our introduction to CisGenome browser.
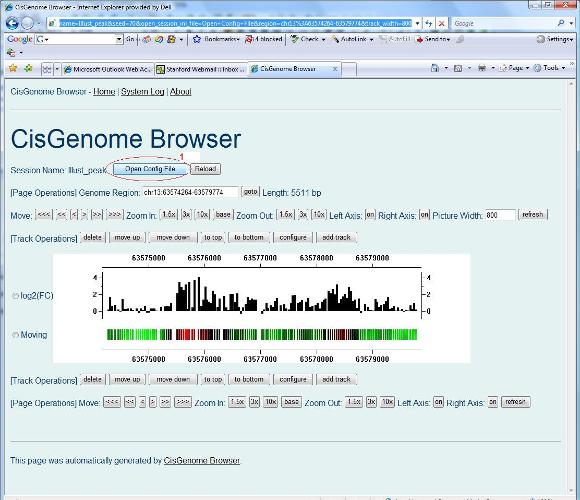
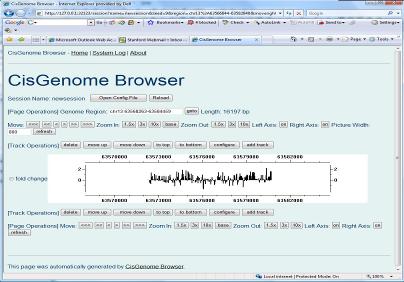
There is one trick you definitely want know about the CisGenome browser: each page displayed in the browser is called a session, and there is a session file that specifies what information to display and how they should be displayed. Want to have a look at the file? You can simply click the “Open Config File” button (red circle 1) and open it using any text editor. |
|
When the file is opened, you will realize that this is a text file which follows the standard INI file format (i.e., $KEY$=$VALUE$ without any blank characters (e.g., spaces, tabs)). |

|
The file first specifies session information, for example, [session] type=genome [genome] num_tracks=2 region=chr13:63574264-63579774
Here, “type=genome” means that the data displayed is genomic regions. “num_tracks=2” means that two tracks will be displayed.
The session file will then specify information for each track, for example, [track1] title=my_peak type=signal src_filename=D:\Projects\peak_1.fc.bar [track2] …
Here, “type=signal” means that the track will be used to display tiling array signals which should be saved in Affymetrix BAR file format. The example here also illustrates the minimal information required by each track.
A session file must have a “.ini” suffix. All session files are stored in a single folder. Where is the folder? First find out the folder that contains CisGenome.exe. There, you will be able to see a subfolder called “browser”. Go to subfolder “ browser > wwwroot > sessions ”, you can now find all the session files.
Does this mean anything to you? Yes, it does. What this means is that, at any time, you can prepare a session file by yourself using a text editor. You can save it to the session folder, and open it with CisGenome Browser without relying on CisGenome GUI. This is particularly useful if you want to run CisGenome Core Programs on a UNIX server but still want to visualize the results on a Windows machine. For programmers and software developers, you can let your program to generate a session file automatically, then you will be able to take the full power of CisGenome Browser to display your data!
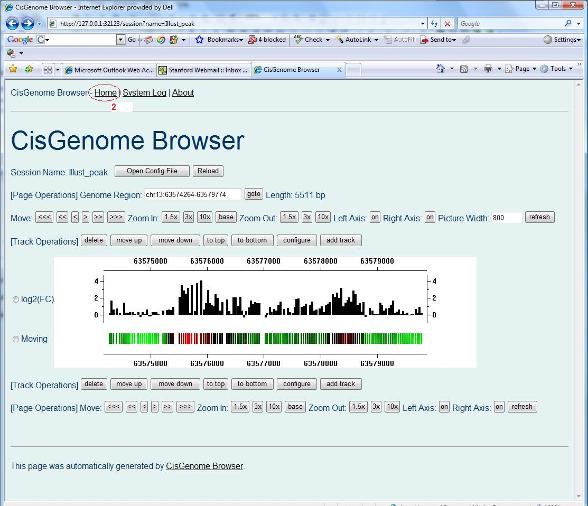
Wait, you may ask “how can I load a session file into the browser?” Here is the answer. At any time, when you click “Home” on the upper left corner of the browser (red circle 2 below), you will be led to a “Home” page of CisGenome Browser. |
|
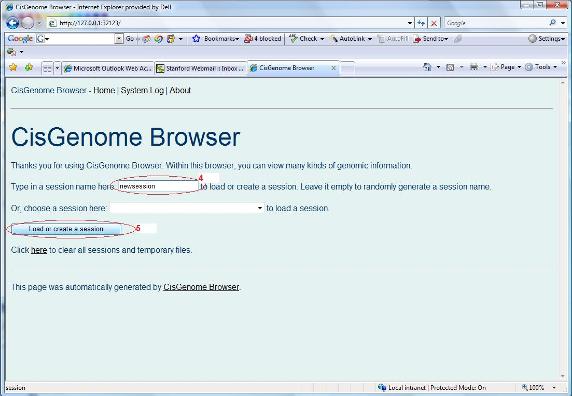
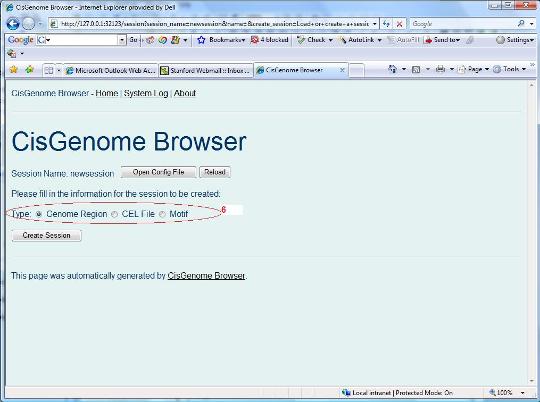
There is another trick I wish to tell you — you can also generate a session file from scratch using the CisGenome Browser itself! To do so, first go to the “Home” page of CisGenome Browser, deselect any existing track, type a session name (red circle 4 below), and click “Load or create a session” (red circle 5). |
|
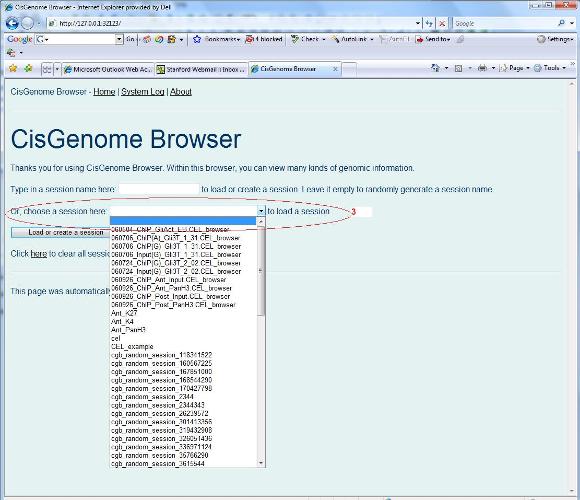
When you click the drop list on the “Home” page to choose a session file (red circle 3 below), all session files in the session folder will be displayed. Choose one, and click the “Load or create a session” button, your session will be loaded. |
|
You will be asked to choose a session type (red circle 6 below) in a new page. Let’s choose “genome region” first. Click the “Create Session” button. |
|
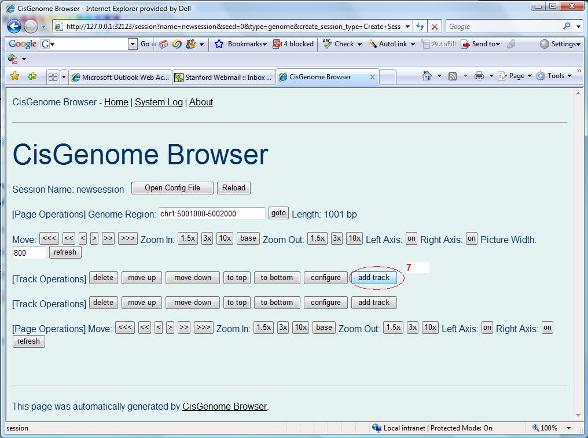
An empty session is now created. You can then add tracks by clicking “add track” button (red circle 7 below). |
|
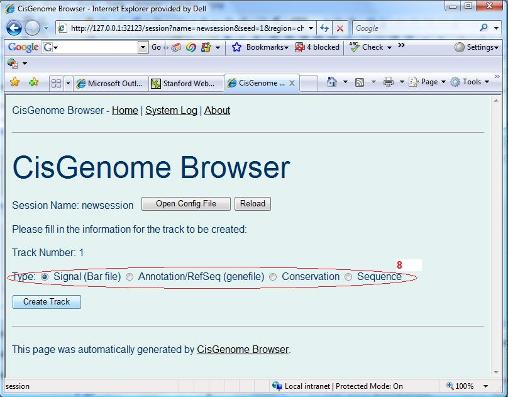
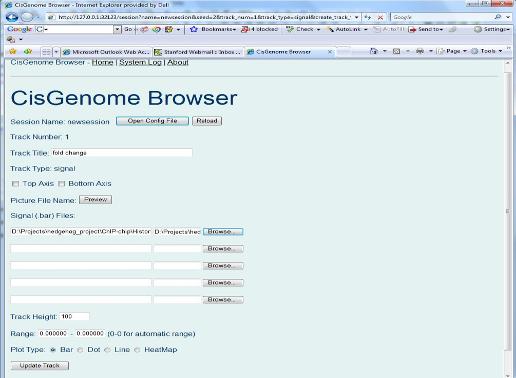
Again, a new page will show up. In this page, you need to specify the track type (red circle 8). Let’s choose “Signal (Bar file)” first. When you click “Create track” button, you will be asked to choose a bar file from your computer. (When you run tiling array peak detection, a series of bar files were generated. You can find them from the folder where you saved your peak detection results. You can choose one of them as a test.). After you specify the bar file, you can click “Update Track” button. Do you see anything? If nothing wrong, you should be able to see a new track in your browser. You can then repeat the same procedure to add more tracks! |
|
At this point you’ve already got a deep understanding of CisGenome Browser, congratulations! Check whether your genome database download has been finished or not. If not, take a break. If yes, now it’s time for us to add gene and DNA tracks! |