|
Tutorial 4: Retrieving Annotations and Sequences |
|
After a list of genomic regions is generated (e.g. from ChIP-chip tiling array experiment), people are often asking: “how can I get gene annotations for thousands of peaks automatically?” On the other hand, when we wish to perform a de novo motif discovery to search for new motifs, we often find that retrieving DNA sequences is such a tedious job. Fortunately, both issues can now be addressed easily by CisGenome.
Before using CisGenome to retrieve gene annotations and DNA sequences, please make sure that you have already downloaded the genome database for the species you are studying, and that you have loaded the database to the CisGenome GUI project. If you haven’t done so, please follow the instructions in the previous pages to do this. |
|
A dialog will jump out to let you choose the COD file. After you add the file to the project, you should be able to find it in the Project Explorer Window, under the section “Genomic Regions (BED, COD)”.
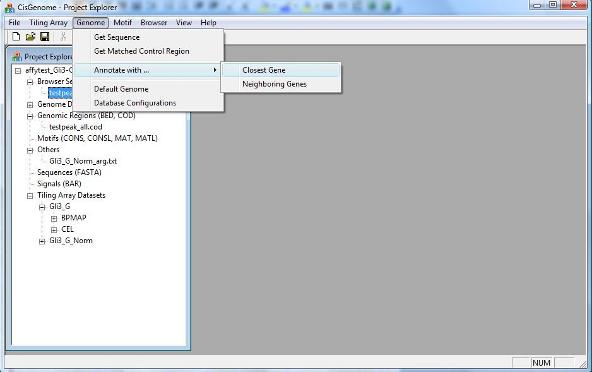
To get the closest genes of a list of genomic regions, you can click the menu “Genome > Annotate with … > Closest Gene”. |
|
A dialog will show up. In this dialog, you need to specify: 1. The genomic regions to be annotated (i.e., a COD file) (red circle 1 below); 2. The genome which the input coordinates are based on (red circle 2); 3. A output file that saves the result (red circle 3). |
1. Link Genomic Regions to Genes |
|
You can annotate a list of genomic regions with genes in their neighborhood. The coordinates of the input regions need to be stored in a tab-delimited text file that follows the COD file format: [region name][tab][chromosome][tab][start][tab][end][tab][strand]
Here is a sample COD file: region1 chr1 0 200 + region2 chr3 5000 5200 - …
The coordinates are 0-indexed, i.e., the first position in a chromosome is indexed by 0, the second position = 1, and so on.
Results generated by CisGenome tiling array analysis are automatically organized in COD format. Actually, after you run tiling array peak detection, a COD file that contains all the peaks is automatically generated and added to your CisGenome Project. You can find it in the Project Explorer Window, under the section “Genomic Regions (BED, COD)”.
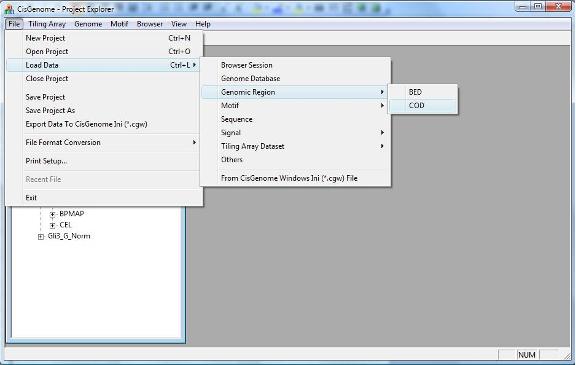
If you want to annotate genomic regions generated externally (e.g., manually compiled by yourself, or automatically generated by other programs), you can do it too. You just need to save them into a COD file. You can then add the COD file to the CisGenome Project by clicking the menu “ File > Load Data > Genomic Region > COD “. |
2. Retrieving DNA sequences |
|
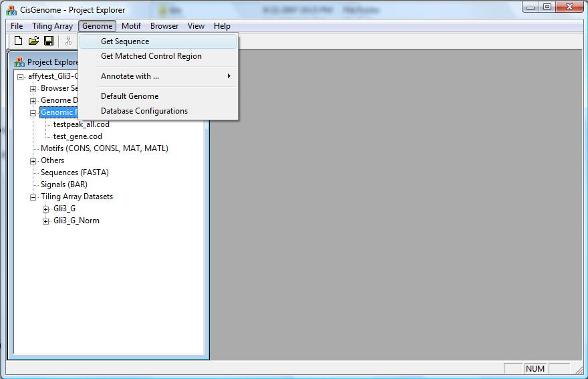
To retrieve DNA sequences from a list of genomic regions, you can click menu “Genome > Get Sequence”. |
|
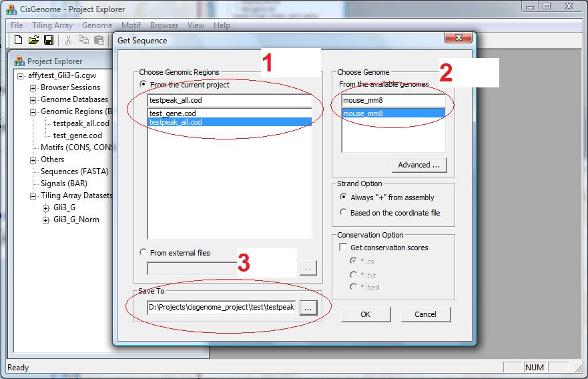
A dialog will jump out to ask you to select: 1. A list of input genomic regions (i.e., a COD file, red circle 1 below); 2. The genome which the input coordinates are based on (red circle 2); 3. A output file to save the sequences. |
|
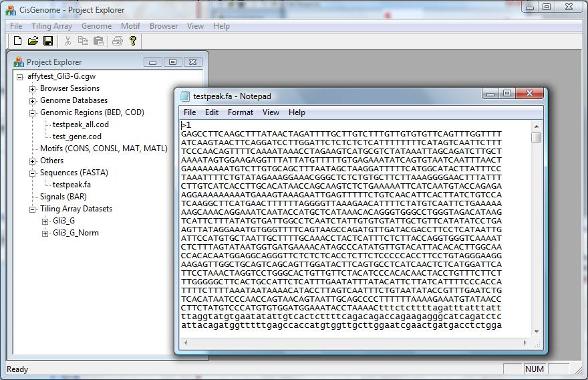
After you set all parameters and click “OK”, a new FASTA file will be generated and added to the Project Explorer window, under the section “Sequences (FASTA)”. When you double click it and open it using a text editor, you will see all the sequences. (Note: in the new version of CisGenome, the sequence file may be automatically opened by the GUI). |
|
With the sequences available, you are well-prepared to proceed to motif analysis. Are you ready? Let’s go >> |

|
There are two other optional parameter settings.
First, how to define “The Closest”, i.e., how to define the distance between a gene and a region (or peak). If you choose “TSS-up, TES-down”: If a peak is located upstream of transcription start (TSS), distance = |TSS-Peak_center|; If a peak is located downstream of transcription end (TES), distance = |TES-Peak_center|; If a peak is located between TSS and TES, distance = 0. If you choose “TSS-up, TSS-down”: Distance = |TSS-Peak_center|. If you choose “TES-up, TES-down”: Distance = |TES-Peak_center|. Similarly, distance can be defined using coding region start (CDSS) and coding region end (CDSE) as reference points.
Second, when the closest gene of a peak is located too far away, you may not want to annotate the peak. In the “Maximal distance allowed” section, you can define what do you mean by “too far away”. “Upstream <=“ specifies the maximal distance from TSS, and “Downstream <=“ specifies the maximal distance from TES.
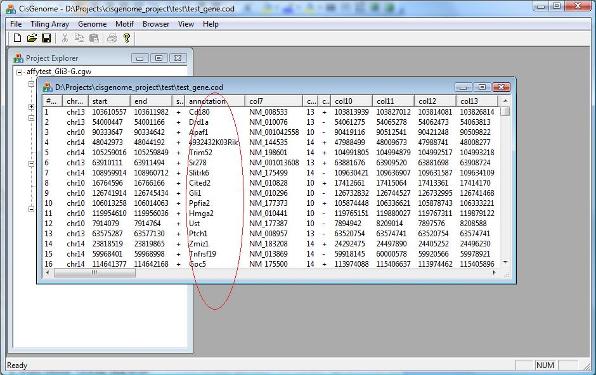
After you set all parameters, you can click “OK”. After a few seconds, a new COD file will be generated and added to your project. The file will report the closest gene for each individual region. |
|
Sometimes, instead of getting the closest gene, you may want to check all the neighbor genes of a region. To get multiple neighbor genes, you can click menu “Genome > Annotate with … > Neighboring Genes”. The use of the function is quite similar to getting the closest gene, and try to explore by yourself!
|